Managing workspaces
6 minute read
Workspaces
A Workspace is identified by a Name, a unique Namespace, and an ID. It contains data, organized in a Cells, and tools used for marking and managing it. It is possible to create and manage all the Tag templates with Tag rules, Shape templates, Access control, Aggregations and Queries in the Workspace settings.
Create new Workspace
-
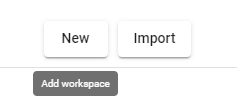
To add a new Workspace, click the
Newbutton.
Figure 1. Add Workspace -
Set the Name and unique Namespace in the popup window. There is an editable ID in the
Advanced setting.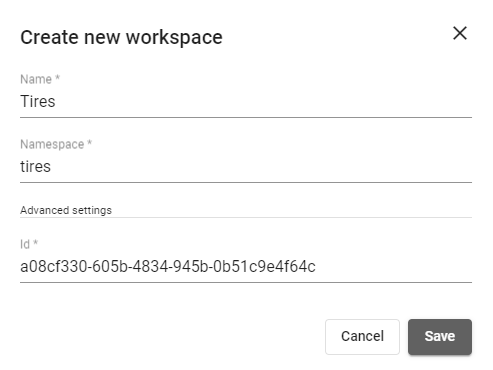 Figure 2. Create new Workspace
Import Workspace
-
Click the
Importbutton to import a JSON of an exported Workspace.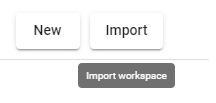 Figure 3. Import Workspace
 -
In the popup window, drop the Workspace JSON file.
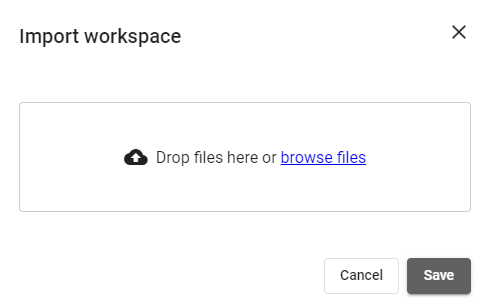 Figure 4. Import Workspace window
 -
Save the imported Workspace.
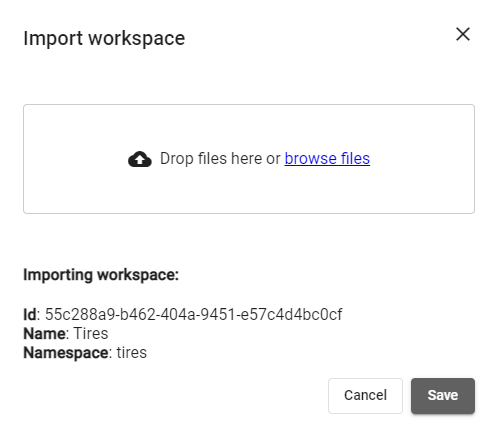 Figure 5. Save Workspace
Open Workspace in the Viewer
-
Click the
Open workspacebutton to open the Workspace in the Viewer app. Figure 6. Open workspace
View logs
-
Click the
View logsbutton to open the Workspace Logs. Figure 7. View logs
The Logs show information about changes in the Workspace.
Export Workspace
-
Click the
Export workspacebutton to download the Workspace JSON file. Figure 8. Export Workspace
The Workspace descriptor is downloaded as a JSON file with information about the Workspace itself, Tag templates and rules, Shape templates, and Favorite Queries and Aggregations. This file can be imported again.
Edit Workspace
-
Click the
Edit workspacebutton to open the Workspace setting. Figure 9. Edit Workspace
In the Workspace settings, it is possible to edit the name of the Workspace, copy its ID, manage
Tagtemplates andTag rules,Queries,Aggregations,Shapes templates, andAccess control.
Delete Workspace
-
Click the
Delete workspacebutton to remove the Workspace. Figure 10. Delete Workspace
|
Note
|
It is possible to delete a Workspace only if it does not contain any Cells. A confirmation dialog will appear. |
Tags
Tag templates have to be created before using the corresponding Tag. They can be managed in the Workspace settings, and applied in the Editor.
Add Tag template
-
Click the
Add tagbutton. Figure 11. Add tag
 -
Fill in the Tag category and name in the popup window.
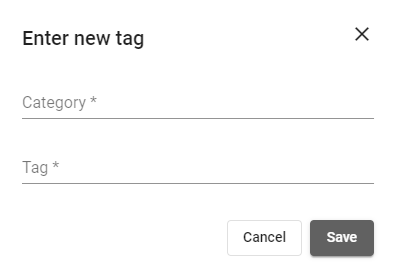 Figure 12. Enter new tag
 -
Set the Tag category from the list of already existing categories or choose a new one. The combination of Tag category and name has to be unique.
-
Save the Tag. Tags are displayed in the list of Tags, sorted by category.
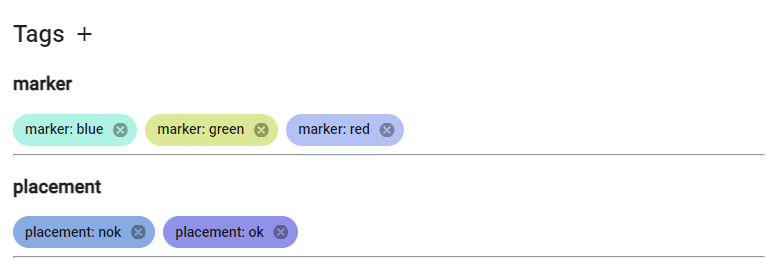 Figure 13. Tags
Remove Tag template
-
Click the
Remove tagbutton on the Tag itself.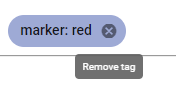 Figure 14. Remove tag button
|
Note
|
The Tag template cannot be removed if any Cell or Cell File is assigned the corresponding Tag. |
Tag rules
Tag rules can be created for any custom Tag category. They are managed in the Workspace settings, in the same tab as Tags.
Add Tag rule
-
Click the
Add rulebutton. Figure 15. Add rule
 -
In the popup window, set the rule name, Tag category, and minimum amount of Tags from that category per Cell, optionally maximum value too.
The combination of rule name and category has to be unique, but there can be more rules applied for one category.
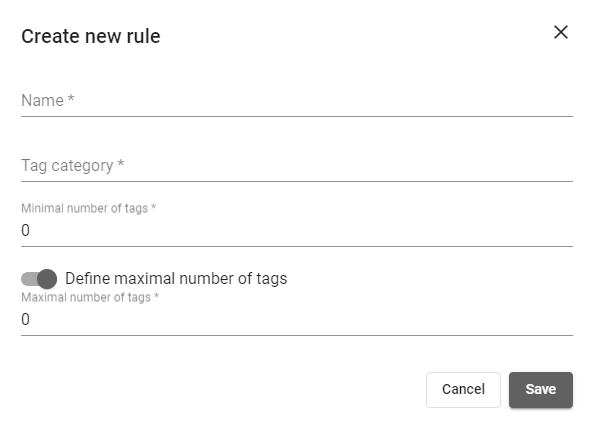 Figure 16. Create new rule
 -
The saved rule is displayed in the list of Tag rules, grouped by category.
 Figure 17. List of rules
Edit Tag rule
-
Click the
Edit rule templatebutton on the Tag rule itself.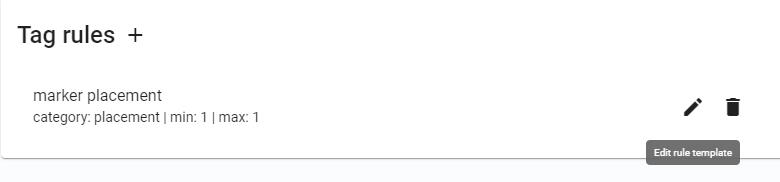 Figure 18. Edit rule template button
 -
A popup window with rule settings is displayed, with all values editable.
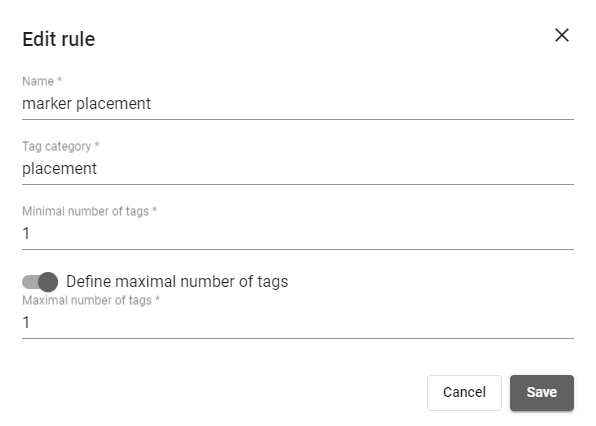 Figure 19. Edit rule
Remove Tag rule
-
Press the
Remove rulebutton on the Tag rule itself.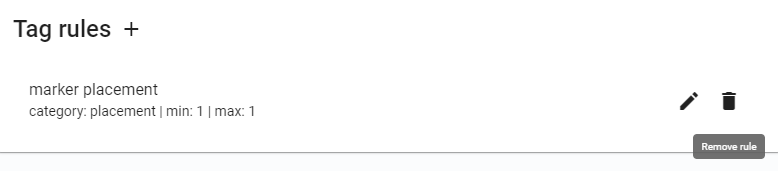 Figure 20. Remove tag button
Queries
Queries can be created and used in Viewer, Editor, Gallery or Statistics. There are more options, for how to create a query, from very simple ones, to advanced options. Fast query is used for Tags, Add query option is used to create simple or advanced queries. As an Advanced query, it can be saved and then used again. All of those can be used only in the active Workspace.
Only advanced queries can be saved and shared.
Add query
-
Click the
Add querybutton. Figure 21. Add query button
 -
Name the query, select
sort by, and create the query. Next to thesavebutton ishelpwith an example query and two buttons to format the query. Figure 22. Create query
 -
The saved query is displayed in the list.
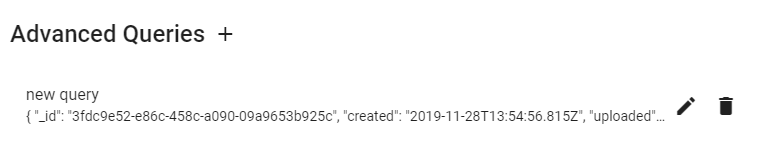 Figure 23. Saved query
Edit query
-
To edit a saved query, click the
Edit querybutton.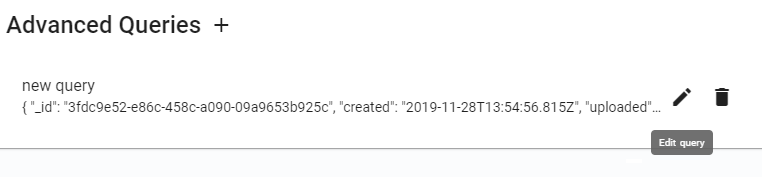 Figure 24. Edit query
Remove query
-
To remove a saved query, click the
Remove querybutton.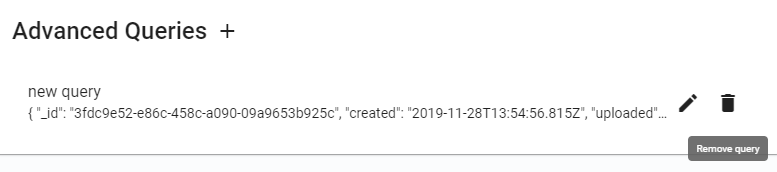 Figure 25. Remove query
Aggregations
Aggregations for local use can be created in the Data Miner.
Add Aggregation
-
Click the
Add aggregationbutton. Figure 26. Add aggregation button
 -
Name the aggregation and create it. To add aggregation created in the Data Miner, go to the Data Miner, create the aggregation or select a favorite one, use the
export aggregationbutton, and copy the displayed aggregation.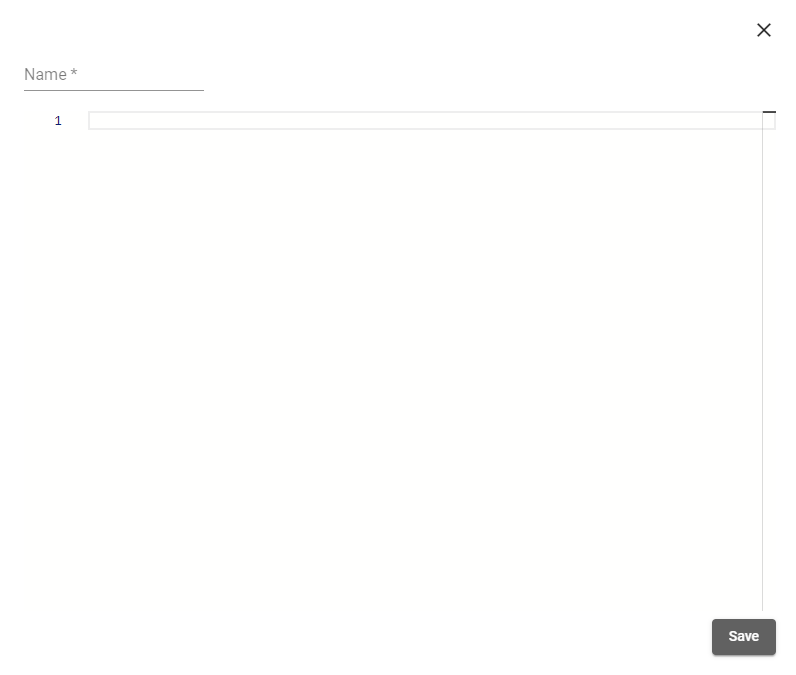 Figure 27. Create aggregation
 -
Saved aggregation is displayed in the list.
 Figure 28. Saved aggregation
Edit Aggregation
-
To edit a saved aggregation, click the
Edit aggregationbutton. Figure 29. Edit aggregation
Remove aggregation
-
To remove a saved aggregation, click the
Remove aggregationbutton. Figure 30. Remove aggregation
Shapes
Every Workspace is created with a set of default Shape templates, one for each Shape type, ready to be used for annotation in the Editor app. A list of available Shape templates is displayed after selecting the Shape to add to the Image. The list of Shape templates belonging to the Workspace is located in the Workspace settings.
Add Shape template
-
Click the
Add shapebutton. Figure 31. Add shape template button
 -
Name the new Shape template and select the Shape type.
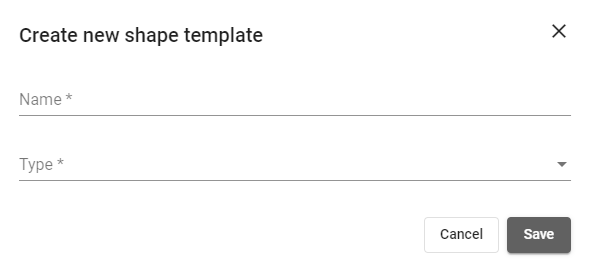 Figure 32. Create Shape template
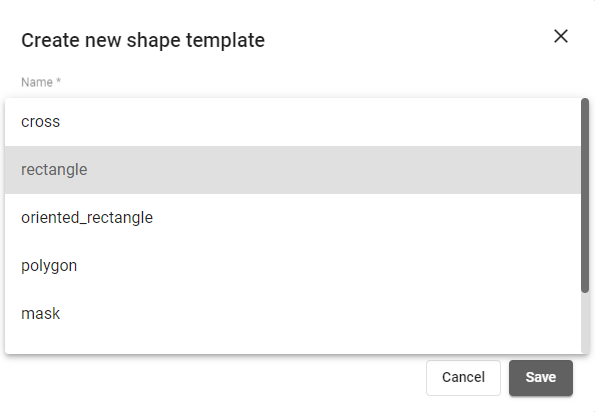 Figure 33. Select Shape type
 -
Set color and alpha of the Shape.
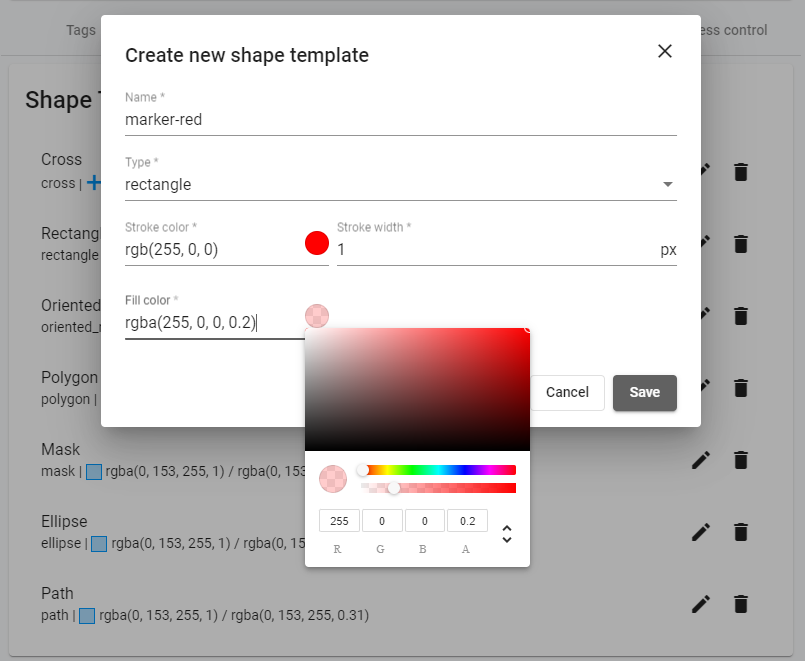 Figure 34. Set color
 -
The saved Shape template is displayed in the list.
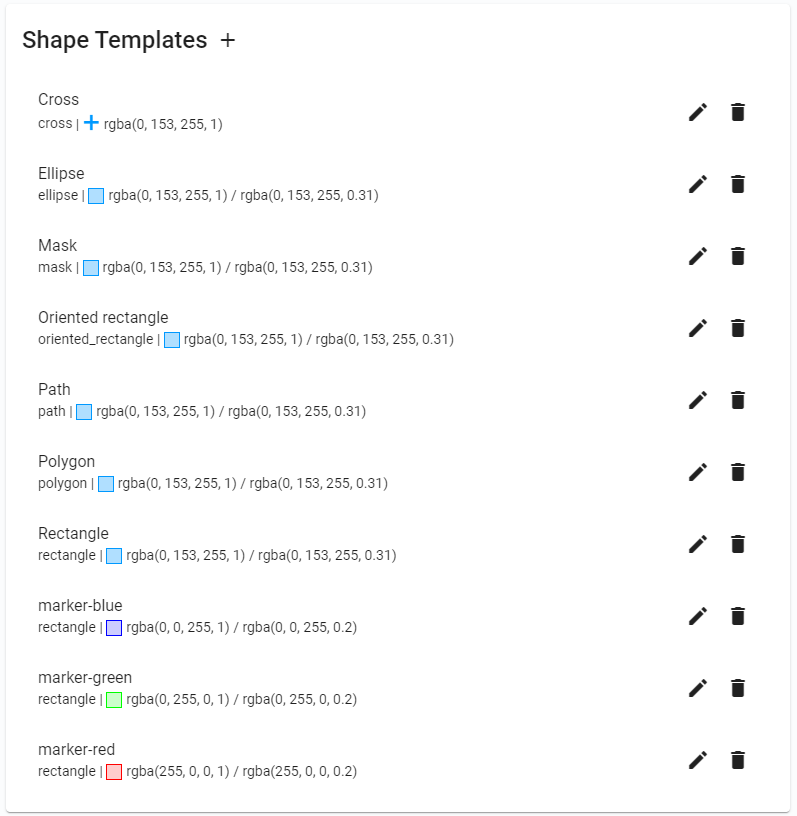 Figure 35. Saved shape template
Edit Shape template
-
To edit a saved shape template, click the
Edit shape templatebutton. Figure 36. Edit shape template
Remove Shape template
-
To remove a saved shape template, click the
Remove shape templatebutton. Figure 37. Remove shape template
Access control
If a user is assigned the own-only role, his or her access rights are defined on a Workspace basis. It is possible to set up a general read/write access, and it is also possible to set up very specific rules, e.g., the user can only access Cells with a specific Tag.
In the Access control is a list of all users with easy Read and Write options and detailed settings.
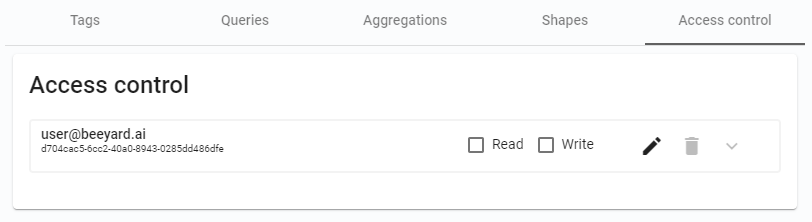
Figure 38. Users
|
Note
|
The Workspace Access control only manages the user rights in that particular Workspace provided the user is not granted any global roles. |
If any access rule was set up, it is possible to click the arrow up/down to see access details, or the clear user settings button to reset it.
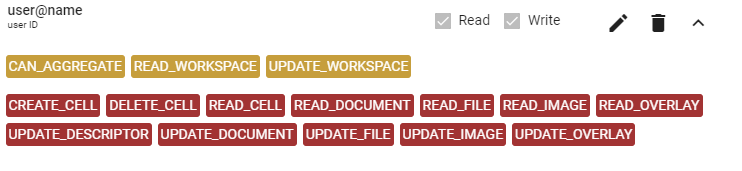
Figure 39. Access details
Edit User settings
-
Click the
Edit user settingsbutton to open detailed user settings. Figure 40. User settings
 -
A popup window with detailed access rules opens.
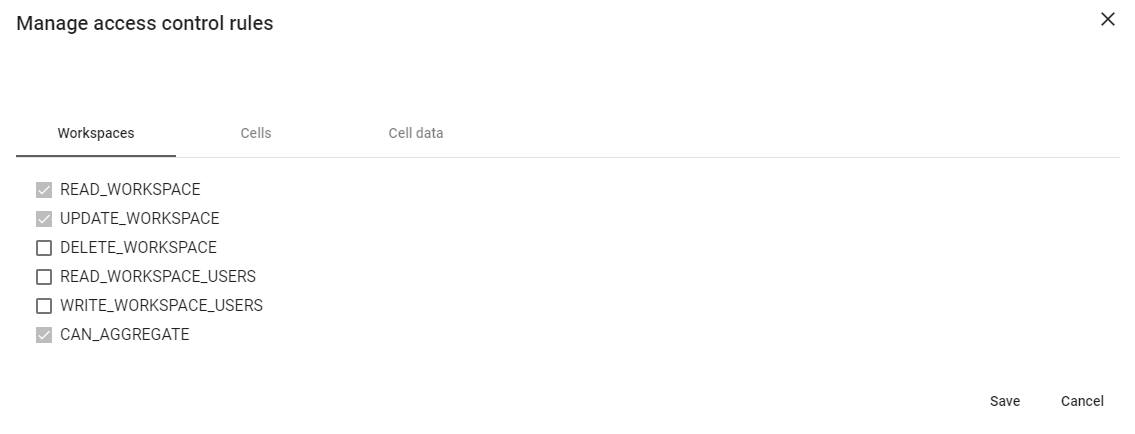 Figure 41. Manage access control rules
The
Workspacetab shows available access rules related to Workspaces. TheCellsandCell datatabs list access rules related to Cells.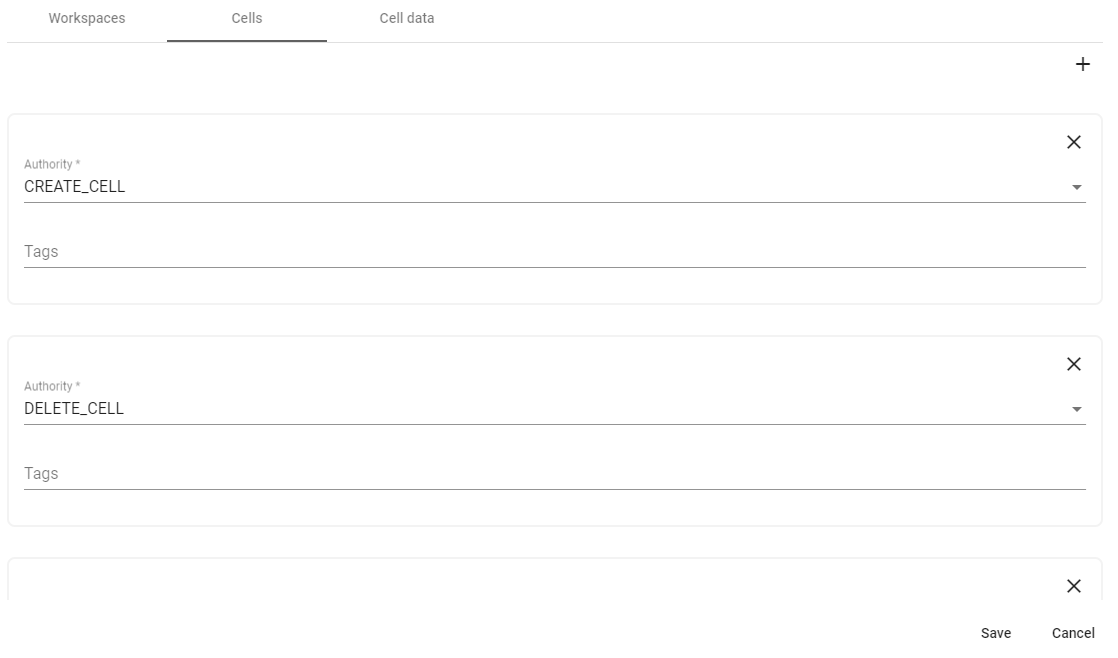 Figure 42. Manage access control rules to Cells
 -
Click
Add cell ruleto add a new access rule. Figure 43. Add cell rule
 -
A new Cell access rule is added at the top of the list. Select
Authorityand optionally Tags.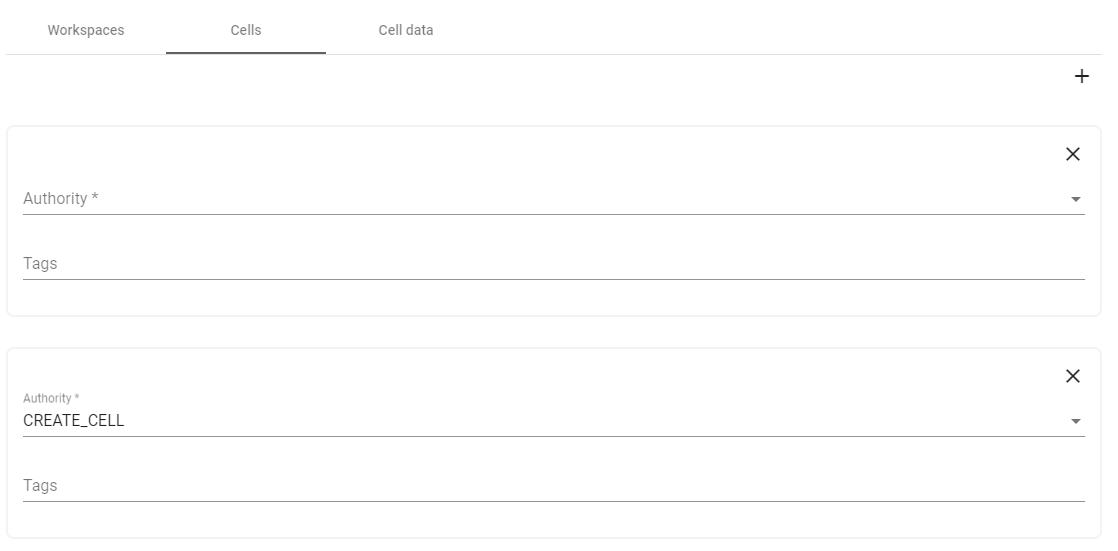 Figure 44. New cell rule